
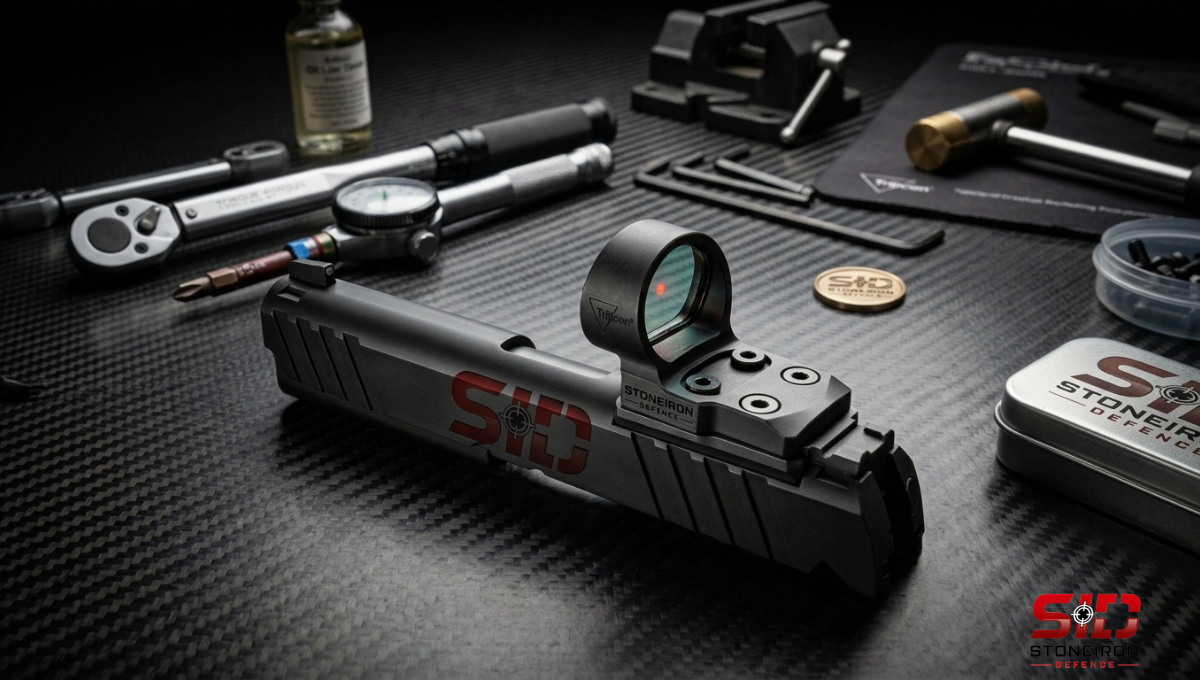
Why Precision Fits Matter: Firearm Optic Plates Guide
Apr 24th 2026
If you’ve spent any real time at the range with a red-dot-equipped handgun or a precision rifle, you’ve probably seen it happen. A shooter steps up to the line, fires a few solid groups, and suddenly their shots start drifting six inches to the left.
They check their sight, give it a wiggle, and realize the optic is rattling loose on the slide. Even worse, sometimes they back off the screws only to find the threads sheared clean off inside the plate.
It’s a frustrating moment, but it happens every single day to shooters who trust generic, mass-produced firearm parts. When you purchase a new optic-ready pistol or receiver rail, manufacturers love to highlight sleek slide cuts, lightweight frames, and budget-friendly price points. What they rarely talk about is the quality of the hardware locking your $500 optic to that slide.
Why does precision fitment matter so much when upgrading your firearm? Let’s strip away the marketing fluff and look at the real-world physics, material engineering, and installation practices that separate fragile factory setups from true duty-grade hardware.
1. The Violent Physics of Your Handgun Slide
To understand why generic parts fail, you first need to appreciate the brutal environment sitting right on top of your handgun slide. When you press the trigger, an explosive charge accelerates a bullet down the barrel. That action creates an equal and opposite reaction, violently slamming the slide backward in a fraction of a second.
The slide travels to the rear, hits the frame bridge, stops abruptly, and then snaps violently forward under spring tension to strip and chamber another round. This entire cycle takes roughly 0.04 seconds. During those milliseconds, your slide-mounted red dot optic experiences violent kinetic forces—often exceeding 2,500 to 3,000 Gs of acceleration force.
The Hidden Culprit: Shear Force on Mounting Screws
Many shooters assume that optic mounting screws are designed to hold the red dot in place against recoil. Mechanically speaking, that is a dangerous misconception. Screws are designed exclusively to handle clamping force—holding the optic pulled down tightly against the plate or slide.
The job of stopping forward and backward sliding movement belongs to the recoil lugs and tight dovetail tolerances. If an optic adapter plate is cut with loose tolerances, tiny gaps exist between the sight housing and the plate lugs. Under recoil, the optic slides back and forth inside those tiny gaps like a tiny battering ram. That kinetic energy transfers directly into the sides of the mounting screws.
After a few hundred rounds, those repeated impacts cause thread fatigue. The screws stretch, loosen, and eventually snap off flush inside the slide.
2. Material Matters: 4140 Steel vs. Soft Aluminum & MIM Parts
When choosing tactical accessories, material selection dictates how your gear handles real-world abuse. Firearm manufacturers often use soft 6061-T6 aluminum or Metal Injection Molding (MIM) for optic plates and controls to cut costs and production times. While these materials are fine for casual range plinking, they quickly fall short during high-volume shooting or defensive duty use.
The Danger of Thermal Expansion Gaps
Different metals expand and contract at different rates when exposed to heat. Your handgun slide is machined from carbon or stainless steel. When you fire rapid strings of ammunition, friction and burning powder heat the slide rapidly.
An aluminum adapter plate expands significantly faster than the steel slide underneath it. This thermal discrepancy creates microscopic flexing at the interface. Over time, that subtle movement breaks the chemical bond of thread-locking compounds (like Blue Loctite), allowing screws to back out naturally.
At StoneIron Defense, we engineer our optic plates from solid 4140 steel. Because the plate and the slide share matching thermal expansion rates and structural density, the interface stays completely rigid—no matter how hot your firearm gets during extended training sessions.
| Material Specification | Recoil Impulse Fatigue | Thread Stripping Resistance | Thermal Expansion Match |
|---|---|---|---|
| Factory Polymer / Plastic Inserts | Extremely High (Flexes, warps, and cracks) | Very Poor (< 8 in-lbs max) | Unacceptable for serious duty |
| 6061-T6 Cast Aluminum Plates | Moderate (Soft threads deform under load) | Moderate (10–12 in-lbs max) | Uneven expansion leads to screw loosening |
| SID Precision 4140 CNC Steel | Zero Flex (Engineered for duty hard-use) | Maximum (15+ in-lbs torque limit) | Perfect match with steel firearm slides |
3. Real-World Application: Upgrading the Springfield Armory Prodigy
To see how precision fitment transforms shooting performance, look at double-stack 1911 platforms like the Springfield Armory Prodigy 1911 DS. The Prodigy is a phenomenal handgun, offering high capacity, a match-grade trigger, and flat-shooting ergonomics. However, its true optical accuracy depends heavily on how your red dot attaches to the slide.
Springfield designed the Prodigy around the Agency Optic System (AOS) dovetail interface. Because different optics use distinct footprints, installing an adapter plate designed specifically for your exact optic model is essential for achieving a seamless, low-profile fit.
Matching the Steel Plate to Your Red Dot Footprint
Using a dedicated steel plate ensures your optic sits as low as possible on the slide axis. A lower optic height reduces height-over-bore offset, making close-range targeting intuitive and allowing you to co-witness your iron sights cleanly:
- Trijicon RMR / SRO Footprints: Hard-use duty shooters who rely on rugged optics need maximum thread engagement. Upgrading with a dedicated Springfield Prodigy Optic Plate for Trijicon RMR / SRO locks the sight firmly into place, handling harsh recoil without shifting point-of-impact.
- Holosun Micro Sights (K-Series): For shooters running compact red dots, the Springfield Prodigy Optic Plate for Holosun 407K / 507K provides precise lug engagement that prevents side-to-side twisting under rapid fire.
- EOTech Enclosed Optics: Shooters running wide-aperture red dots benefit from the reinforced housing alignment of the Springfield Prodigy Optic Plate for EOTech EFLX, keeping zero locked during high-volume strings.
- Vortex & HEX Footprints: Competition shooters using larger glass need zero slop. The Springfield Prodigy Optic Plate for Vortex Viper / HEX Dragonfly delivers a snug fit that keeps your reticle tracking predictably.
4. Precision Beyond Handguns: Rifle Rails and Scope Rings
Precision engineering isn’t just critical for handguns; it’s equally vital for long-range rifles and tactical carbines. When mounting high-magnification scopes, night vision units, or laser designators to a rifle, your foundation is the MIL-STD-1913 Picatinny rail.
If a rifle receiver rail is machined out of spec, the cross-slots will vary slightly in width and depth. When you torque down your scope rings, the clamping bars tilt slightly sideways. This places uneven binding pressure on the main tube of your scope, pinching the internal erector tube and making elevation adjustments sticky or erratic.
"You can buy a $2,000 glass optic, but if it’s clamped into out-of-spec mounting rings on a soft aluminum rail, you’re shooting through a broken system."
Investing in precision-machined steel rails and matched scope rings ensures that clamping forces are evenly distributed across the entire optic tube. This protects internal lenses while maintaining absolute zero retention when transporting your rifle in rugged field conditions.
5. The Armorer’s Guide to Flawless Optic & Hardware Installation
Even the highest-quality CNC-machined steel components will fail if installed incorrectly. If you want your hardware to survive thousands of rounds without loosening, follow this step-by-step armorer installation protocol:
Step 1: Thoroughly Degrease All Threads
New firearm parts ship coated in anti-corrosion packing oils. Oil acts as an unwanted lubricant. If you apply thread-locking compound over oil, it will not cure properly. Spray the threaded holes in your slide, the optic plate, and the mounting screws with isopropyl alcohol or aerosol brake cleaner, then blow them completely dry with compressed air.
Step 2: Dry Fit and Check Right-Side Screw Clearance
On many modern handguns (including the Springfield Prodigy and Glock MOS platforms), the right-side mounting screw sits directly above the internal extractor spring channel. If your mounting screw is even half a millimeter too long, it will press down into the channel and pin the extractor in place—causing immediate failures to extract (FTE).
Always dry-fit your screws without threadlocker first. Look down the extractor channel or test extractor spring tension to confirm the screw isn’t contacting internal moving parts.
Step 3: Apply the Correct Threadlocking Compound
Never use permanent Red Loctite unless you plan on using a blowtorch to remove your optic later. Instead, use medium-strength Blue Loctite 242/243 or Vibra-Tite VC-3. Apply one small drop to the lower threads of each screw—excess compound can squeeze down into internal firing pin channels.
Step 4: Use a Calibrated Inch-Pound Torque Driver
Guessing tightness by hand is the fastest way to ruin a mounting plate. Tightening by hand usually results in under-torquing (causing screws to back out) or over-torquing (stripping out threads or snapping screw heads off). Use a dedicated inch-pound torque wrench and tighten screws to the manufacturer's exact specification—typically 12 to 15 in-lbs for optic screws.
Step 5: Mark Your Screws with Witness Lines
Once your screws are torqued and cured, take a fine-tipped paint marker or paint pen and draw a small reference line across the screw head onto the optic body. These visual "witness marks" allow you to inspect your firearm instantly during range sessions. If the paint lines ever misalign, you’ll know a screw has started to back out before your optic comes loose.
Never Settle for Weak Connections
In shooting sports and defensive applications, consistency is everything. Every single piece of equipment attached to your firearm must work together without movement or mechanical failure. Choosing low-grade cast aluminum plates or soft hardware introduces unnecessary weak points into an otherwise reliable setup.
By upgrading to precision CNC-machined 4140 steel optic plates and quality hardware, you eliminate slop, prevent sheared screws, and guarantee that your sight stays dead-on target across thousands of rounds downrange.
Upgrade Your Firearm Hardware with StoneIron Defense (SID)
Don't let cheap factory plates compromise your optics. Explore our full lineup of American-engineered 4140 steel optic adapter plates, mounting rails, and tactical accessories designed for maximum reliability.